
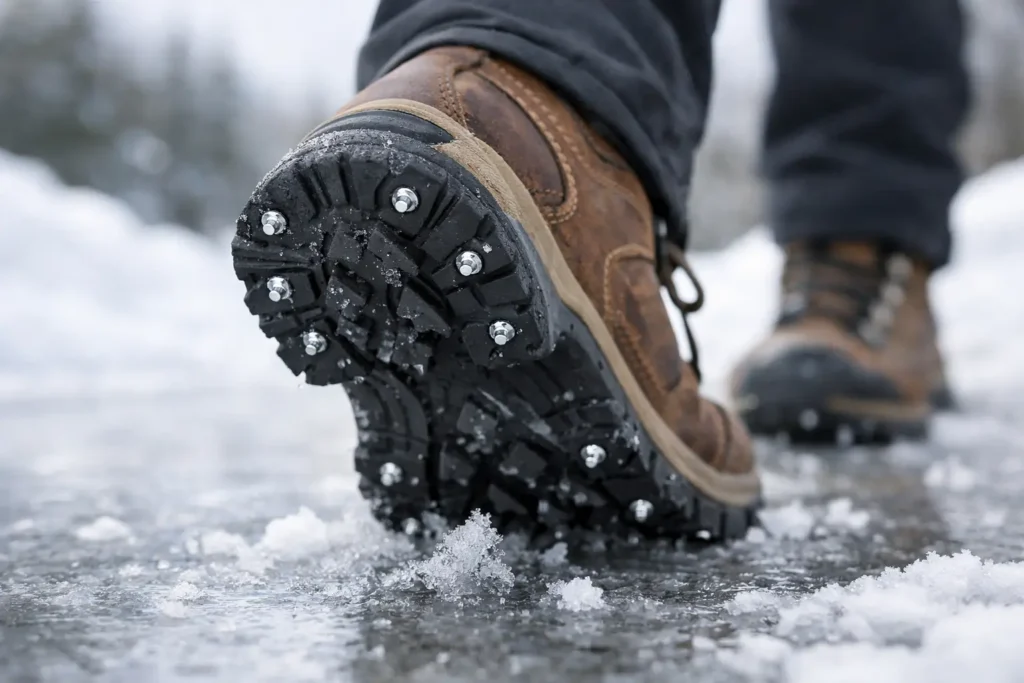
A boot can look tough and still slide without warning. Deep lugs help in soft snow and mud, but packed snow, wet leaves, glare ice, and frozen ground demand a different kind of grip. If you want to know how to improve boot traction, start by matching your footwear and traction setup to the surfaces you actually cross – not the ones printed on the boot box.
For a runner, that might mean an icy neighborhood route before sunrise. For a hiker, it can mean a shaded downhill stretch that stays frozen long after the rest of the trail thaws. For outdoor workers, anglers, and anyone walking a dog or taking out trash in winter, the risk may be a short stretch of ice close to home. In every case, the goal is the same: secure footing that does not make your boots heavy, awkward, or tiring to wear.
Start With the Sole You Have
Before adding traction, inspect the boot sole. Worn-down lugs, hardened rubber, and uneven heel wear all reduce the surface area available to grip. A boot that once handled wet dirt well may become unreliable after a few hard seasons, especially if the outsole rubber has become smooth or stiff.
Clean the sole thoroughly first. Packed mud, small stones, and road salt can fill the channels between lugs and prevent the tread from biting into loose terrain. Use a stiff brush and water, then let the boot dry completely. This simple step will not turn a worn boot into an ice boot, but it restores the traction the existing tread is designed to provide.
Next, look at the lug pattern. Wide, deep lugs shed mud and grab loose snow better than shallow, closely spaced tread. A defined heel brake helps on descents. But rubber tread has limits. On hard ice, slick rock, frozen mud, and wet roots, even an aggressive outsole can skate because there is nothing for the rubber to penetrate. That is where mechanical traction earns its place.
How to Improve Boot Traction for Real Terrain
The right solution depends on whether your footing problem is soft, hard, or constantly changing. Soft mud and loose snow call for open tread that can clear itself. Smooth ice and hard-packed snow require sharp contact points that can bite into the surface. Mixed terrain requires a setup that gives you grip without turning every step into a clumsy, high-profile stomp.
For occasional use on a single icy walkway, a removable traction device can be enough. The trade-off is that many over-boot designs use bulky harnesses, chains, or coils that can shift underfoot, collect snow, and change the way your foot lands. They also need to be carried, pulled on, and removed when conditions change. That may be acceptable for a short trip, but it is not always ideal for people who move all day.
For boots used regularly on ice, snow, mud, gravel, or slick trails, direct-to-sole spikes offer a more integrated approach. Screw-in traction spikes install into the outsole, placing durable bite points where your boot needs them most while keeping the upper clear of straps and hardware. The result is a lighter, more natural-feeling traction upgrade that stays with the boot rather than riding over it.
ICESPIKE traction spikes are built for this kind of practical, year-round grip. They are designed to be installed directly in the sole and removed when conditions or activities call for a smoother outsole. That flexibility matters if one pair of boots goes from frozen morning chores to muddy trails, gravel access roads, or winter work sites.
Put Traction Where Your Foot Needs It
Placement matters as much as the traction device itself. The heel is the braking zone. It takes a heavy load when you walk downhill, step off a curb, or shift backward on an icy slope. The forefoot is the drive zone, helping you push off securely as you walk, run, climb, or carry a load.
A balanced installation typically places spikes across the heel and forefoot, using the firmest parts of the outsole. Avoid thin rubber sections, deep flex grooves, air pockets, and areas where the sole is already separating from the boot. The goal is to create several secure points of contact without interfering with the boot’s natural flex.
Do not assume more spikes always mean better traction. Too many aggressive points can make a boot feel harsh on pavement, tile, polished concrete, or other hard indoor surfaces. The best setup accounts for your primary terrain, your body weight, the boot’s sole thickness, and how you move. A trail runner often wants low-bulk grip that preserves stride and ground feel. A worker carrying equipment may prioritize firm heel braking and stable push-off. A senior walking icy paths may value predictable, confidence-building contact with every step.
If you are unsure whether a boot can support screw-in spikes, check the outsole construction. Thick rubber lugs and solid sole sections generally provide the best mounting areas. Lightweight fashion boots, thin foam soles, and badly worn work boots may not be the right candidates. Traction hardware needs a solid foundation.
Keep Your Boots Working After Installation
Good traction is not a one-time project. Check your boots before heading into difficult conditions, especially after long walks on gravel, pavement, frozen ground, or rocky trails. Look for loose, damaged, or missing traction points and inspect the surrounding rubber for tearing. A quick check in the garage is far better than discovering a problem halfway down an icy hill.
Clean boots after exposure to road salt and wet mud. Salt dries rubber and can accelerate wear around the sole. Rinse it away, remove packed debris, and dry boots at room temperature. Do not bake wet boots beside a heater or place them directly on high heat. Excessive heat can dry out leather, weaken adhesives, and stiffen rubber – all of which can compromise comfort and performance.
Pay attention to how the boot feels as well. If a familiar pair suddenly feels unstable, it may be time to clean the lugs, rotate or replace worn traction points, or retire the boot from demanding use. Footwear failure is often gradual, which makes it easy to ignore until the ground gets slick.
Change Your Movement, Not Just Your Gear
Better traction gives you more margin for error. It does not make ice harmless. On steep slopes, black ice, wet metal, or glazed wooden steps, slow down and keep your weight centered over your feet. Shorter steps reduce the force that can send a foot sliding forward. Keep your hands free when possible, and use a handrail or trekking poles when the terrain calls for added stability.
Avoid walking normally from dry concrete straight onto ice. Pause, test the surface, and let your boots engage before committing your weight. This is especially relevant when entering shaded trails, parking lots, boat ramps, and bridges, where thin ice can be hard to see.
The same caution applies when you move from outdoor traction surfaces to indoor flooring. Sharp traction points are made to bite outdoors, not to grip finished floors. Remove or adjust your traction setup when the environment changes, and protect both your footing and the surface beneath you.
Choose Confidence Over Compromise
The best way to improve boot traction is not to rely on one feature or one season. Start with a sound outsole, keep it clean, use tread suited to loose terrain, and add mechanical bite when hard, slick surfaces are part of the job. Choose a traction system that supports the way you walk, work, run, and explore instead of fighting your natural gait.
When winter turns a familiar route into uncertain ground, dependable grip changes more than your footing. It lets you keep moving with purpose.